Android Studio Emulator
Learn how to set up the Android Emulator to test your app on a virtual Android device.
If you don't have an Android device available to test with, we recommend using the default emulator that comes with Android Studio. If you run into any problems setting it up, follow the steps in this guide.
Set up Android Studio's tools
1
Download and install Android Studio.
2
Open the Android Studio app, click More Actions and select SDK Manager.
3
Open Android Studio, go to Settings > Languages & Frameworks > Android SDK. From the SDK Platforms tab, select the latest Android version (API level).
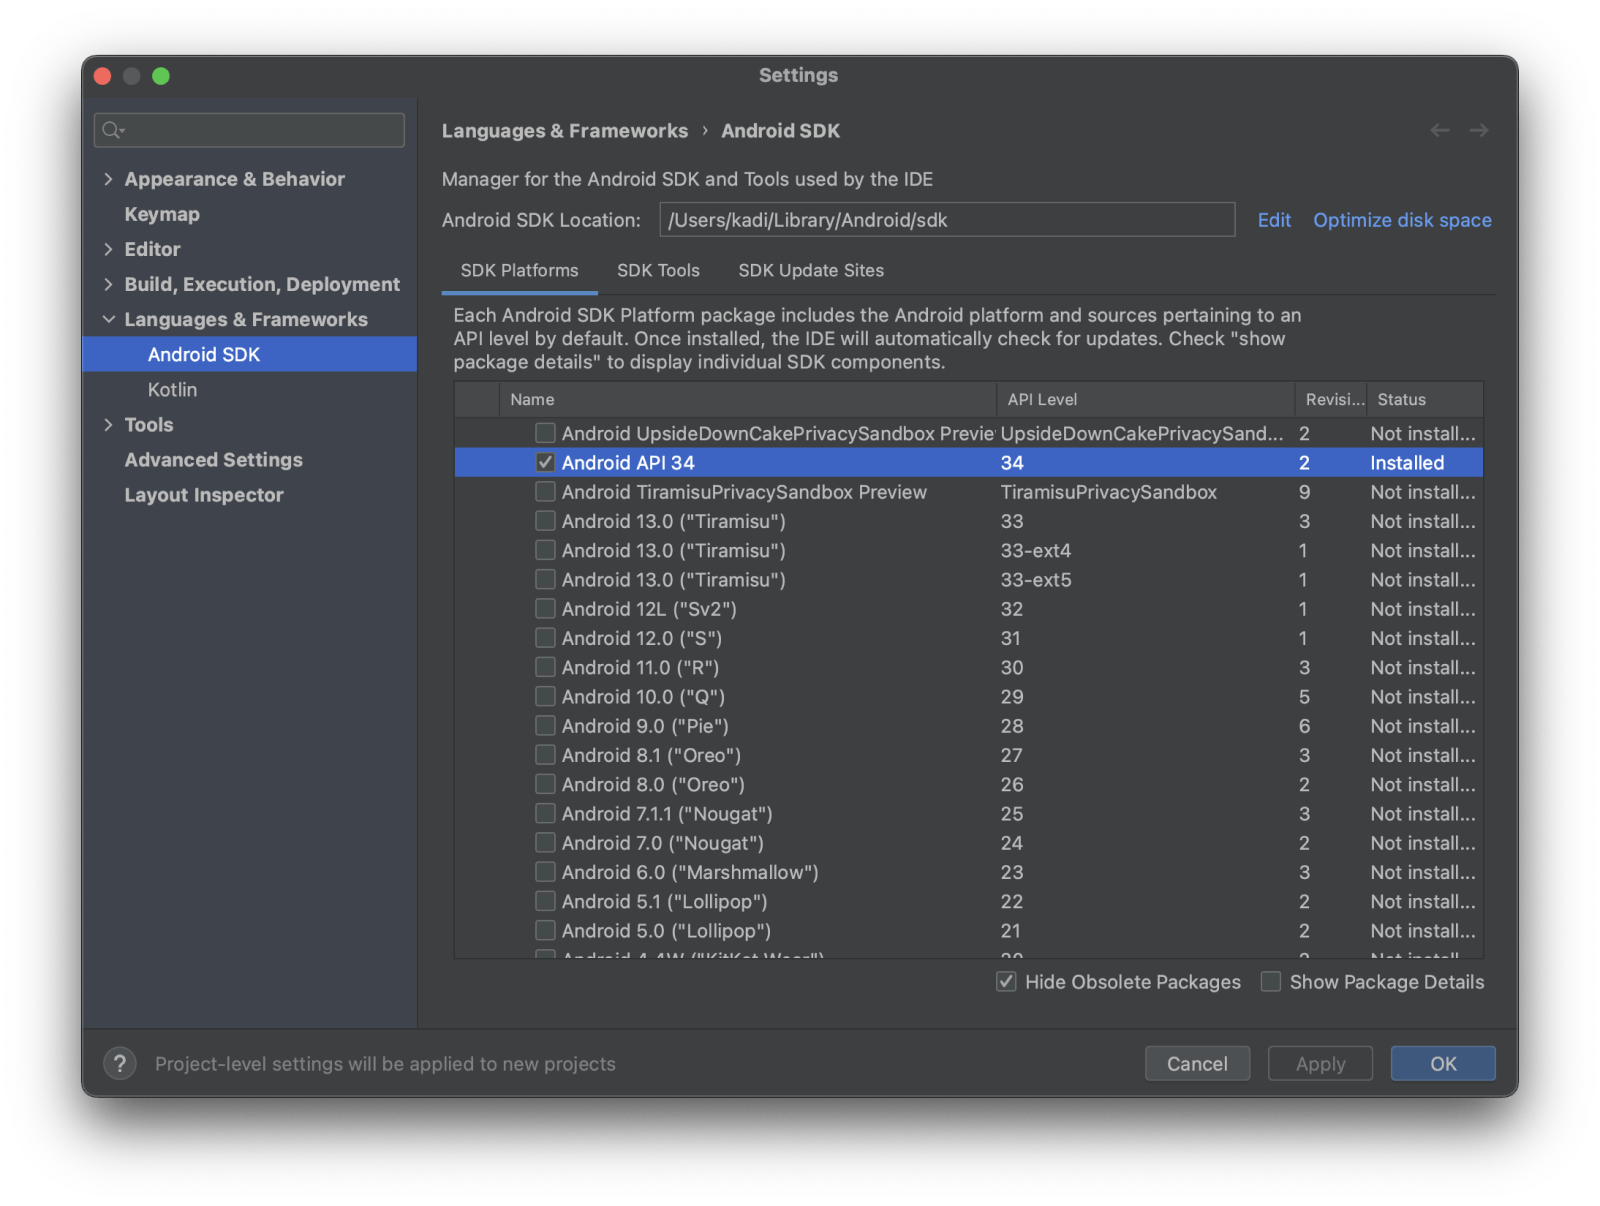
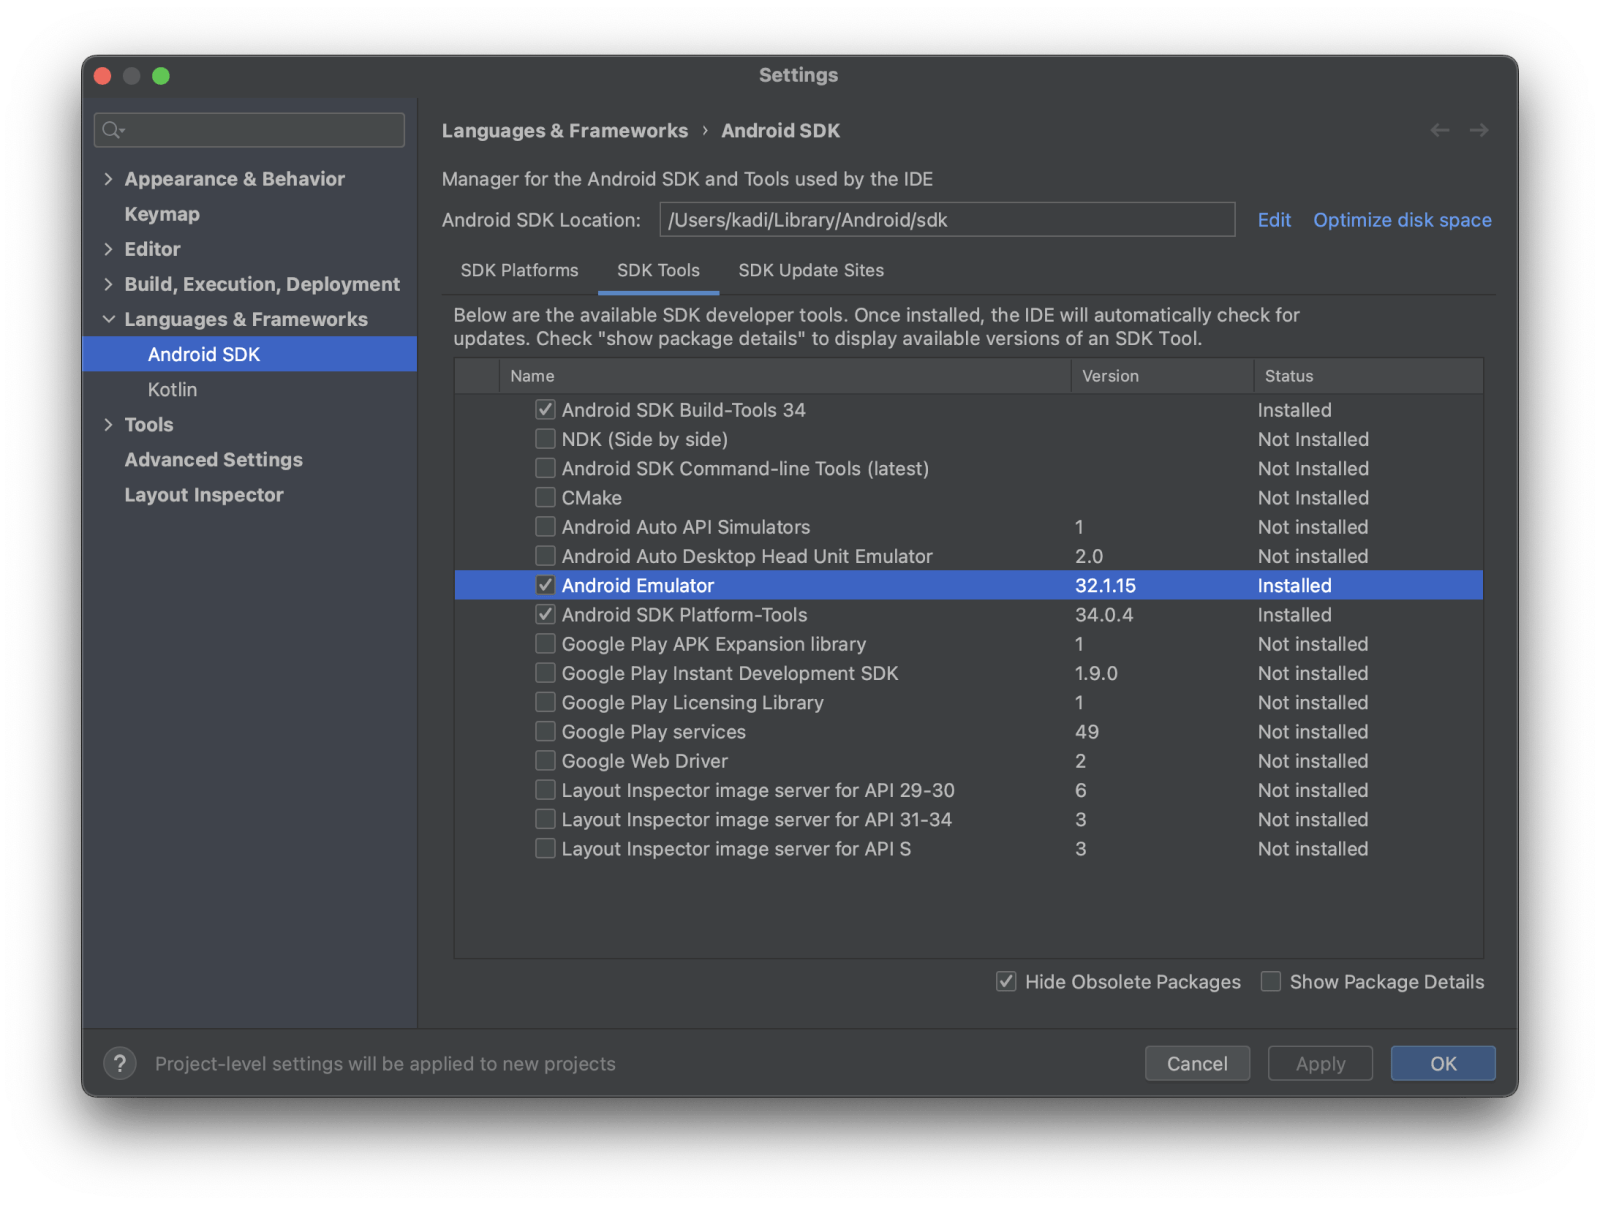
Then, click on the SDK Tools tab and make sure you have at least one version of the Android SDK Build-Tools and Android Emulator installed.
4
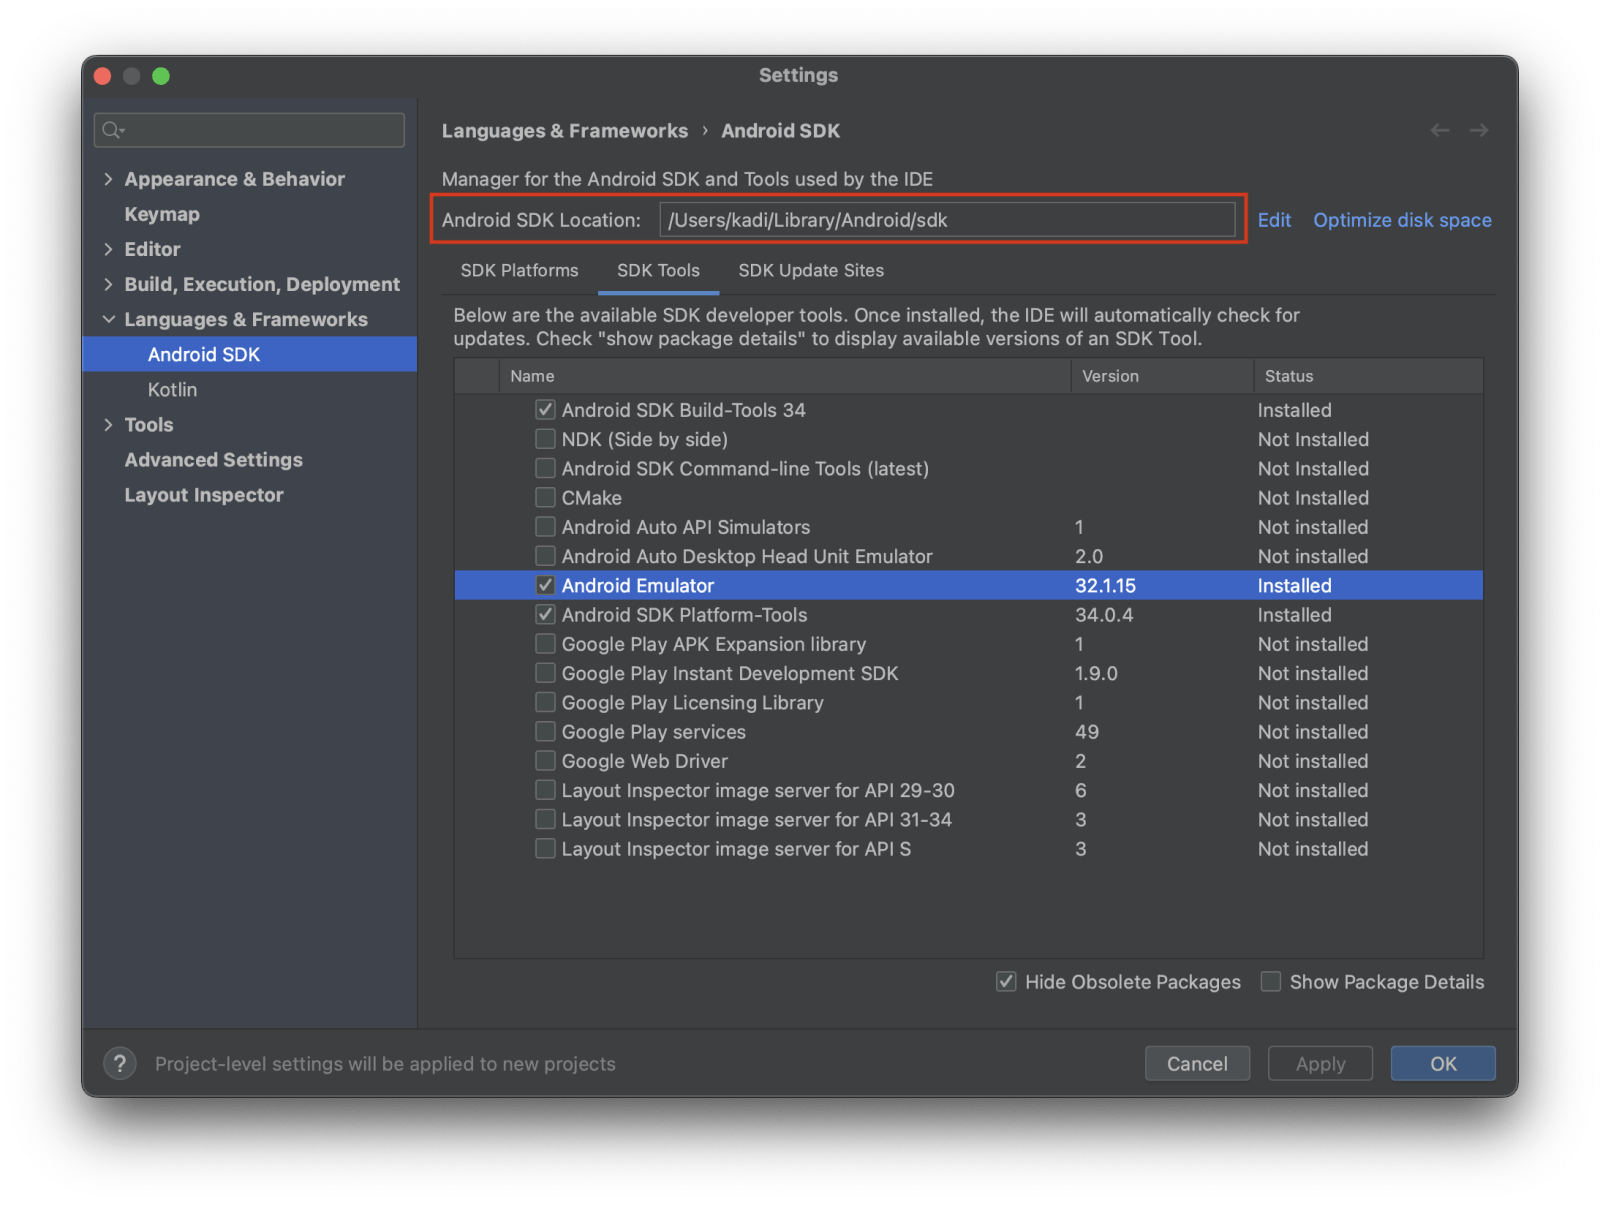
Copy or remember the path listed in the box that says Android SDK Location.
5
Click Apply and OK to install the Android SDK and related build tools.
6
If you are on macOS or Linux, add an environment variable pointing to the Android SDK location in ~/.bash_profile (or ~/.zshrc if you use Zsh). For example: export ANDROID_HOME=/your/path/here.
Add the following lines to your /.zprofile or ~/.zshrc (if you are using bash, then ~/.bash_profile or ~/.bashrc) config file:
export ANDROID_HOME=$HOME/Library/Android/sdkexport PATH=$PATH:$ANDROID_HOME/emulatorexport PATH=$PATH:$ANDROID_HOME/platform-tools7
Reload the path environment variables in your current shell:
# for bashsource $HOME/.bashrc# for zshsource $HOME/.zshrc8
Finally, make sure that you can run adb from your terminal.
1
Download Android Studio.
2
Open Android Studio Setup. Under Select components to install, select Android Studio and Android Virtual Device. Then, click Next.
3
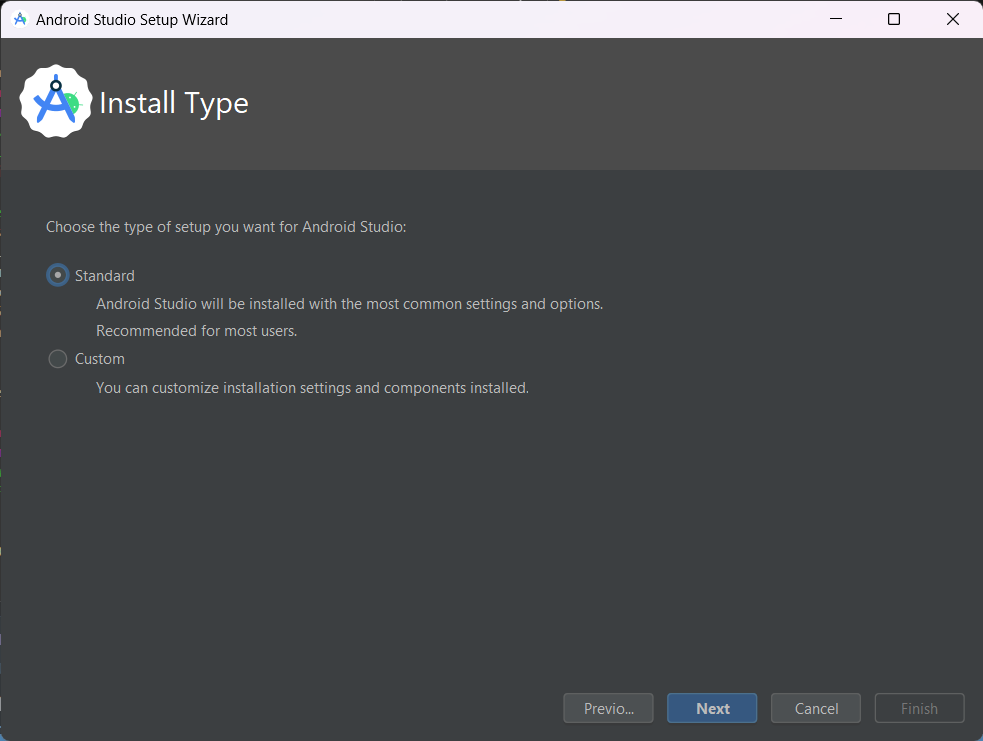
In the Android Studio Setup Wizard, under Install Type, select Standard and click Next.
4
The Android Studio Setup Wizard will ask you to verify the settings, such as the version of Android SDK, platform-tools, and so on. Click Next after you have verified.
5
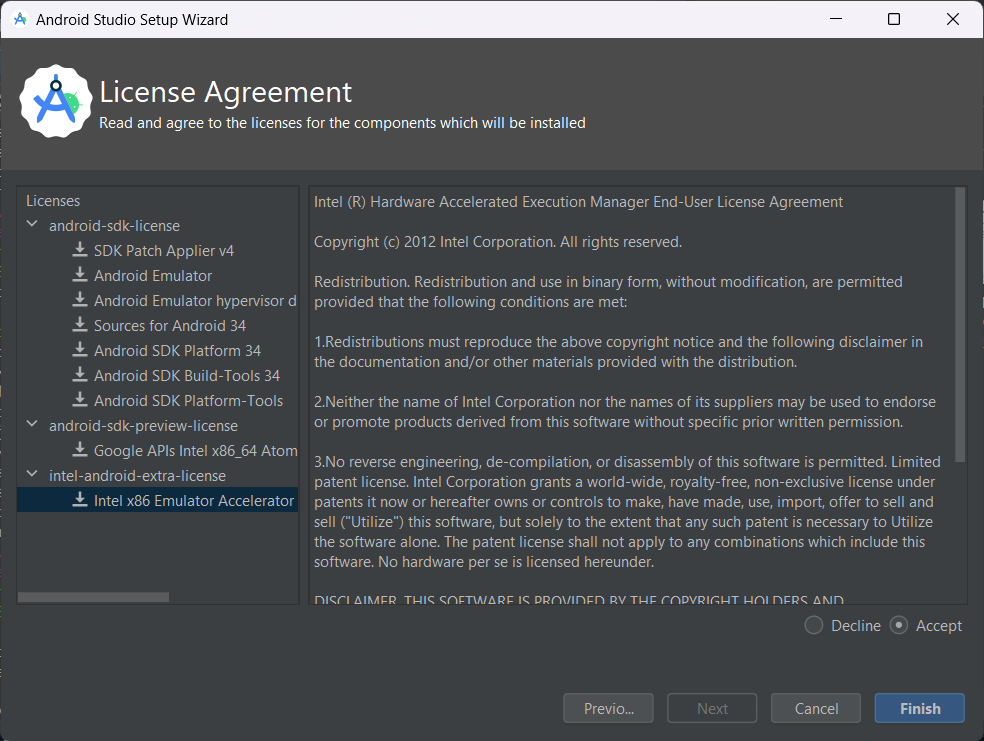
In the next window, accept licenses for all available components.
6
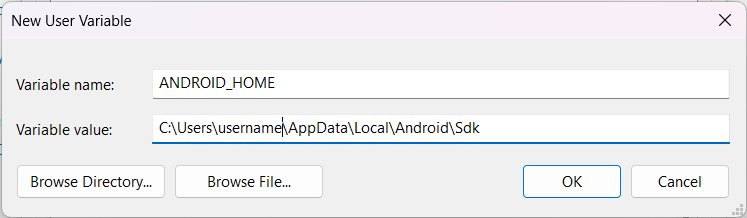
After the tools installation is complete, configure the ANDROID_HOME environment variable. Go to Windows Control Panel > User Accounts > User Accounts (again) > Change my environment variables and click New to create a new ANDROID_HOME user variable. The value of this variable will point to the path to your Android SDK:
How to find installed SDK location
By default, the Android SDK is installed at the following location:
%LOCALAPPDATA%\Android\Sdk
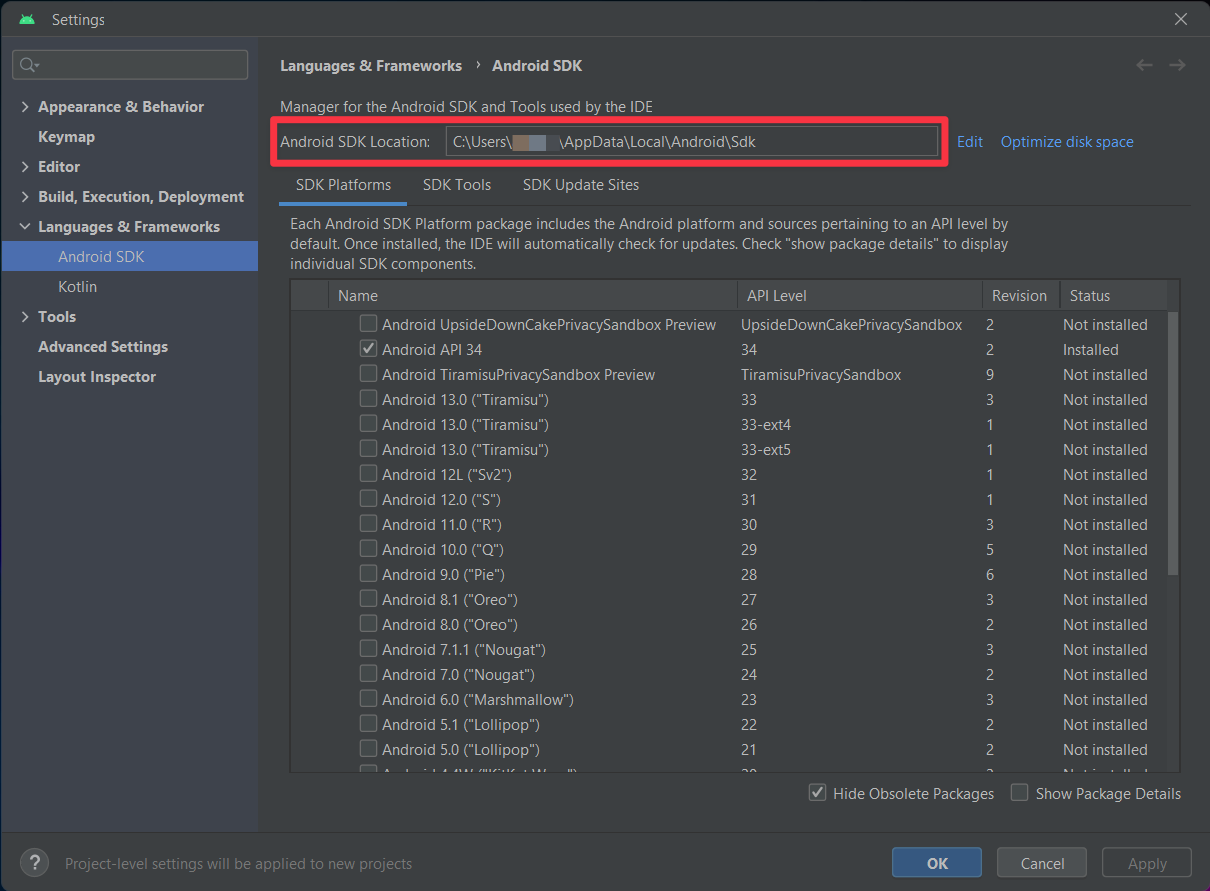
To find the location of the SDK in Android Studio manually, go to Settings > Languages & Frameworks > Android SDK. See the location next to Android SDK Location.
7
To verify that the new environment variable is loaded, open PowerShell, and copy and paste the following command:
- Get-ChildItem -Path Env:The command will output all user environment variables. In this list, see if ANDROID_HOME has been added.
8
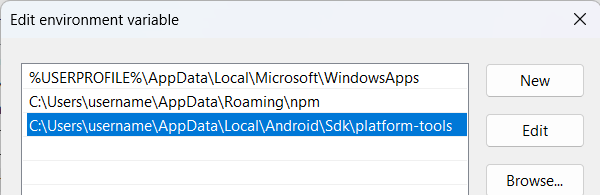
To add platform-tools to the Path, go to Windows Control Panel > User Accounts > User Accounts (again) > Change my environment variables > Path > Edit > New and add the path to the platform-tools to the list as shown below:
How to find installed platform-tools location
By default, the platform-tools are installed at the following location:
%LOCALAPPDATA%\Android\Sdk\platform-tools
9
Finally, make sure that you can run adb from the PowerShell. For example, run the adb --version to see which version of the adb your system is running.
Set up a virtual device
1
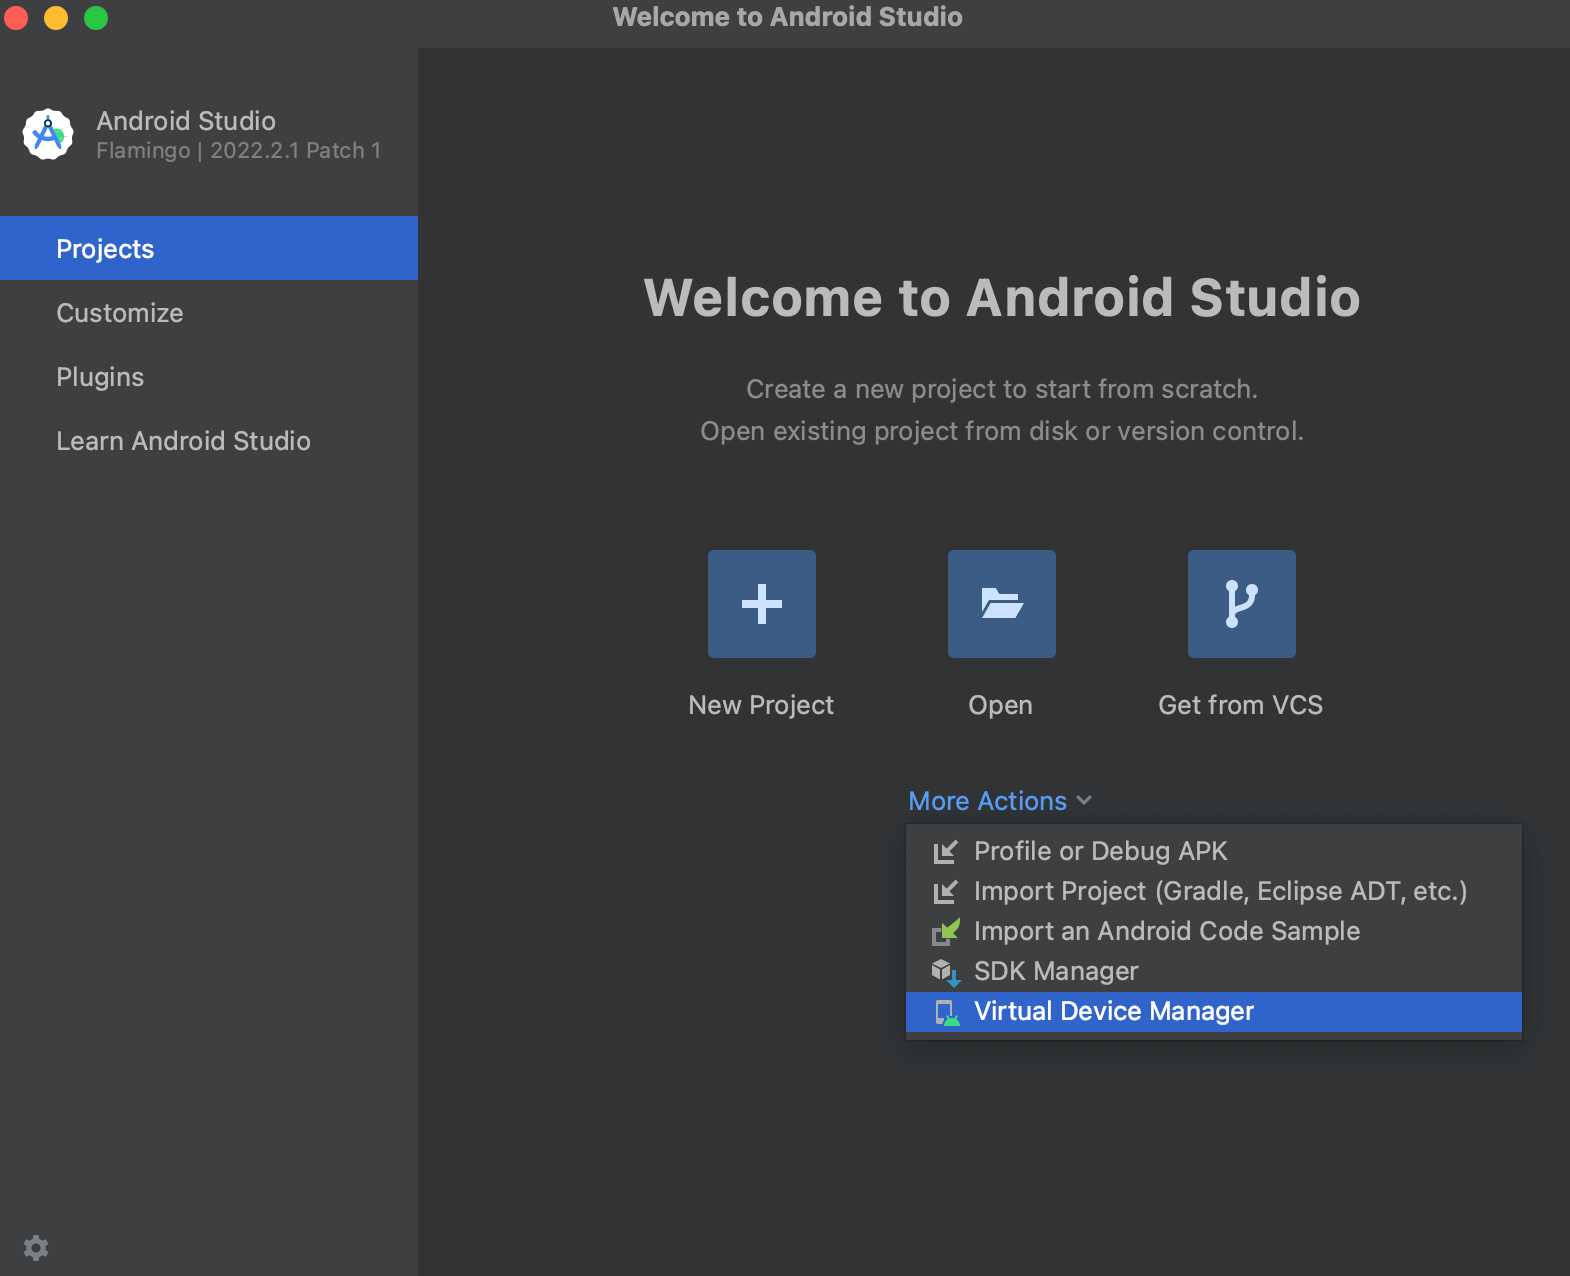
On the Android Studio main screen, click More Actions, then Virtual Device Manager in the dropdown.
2
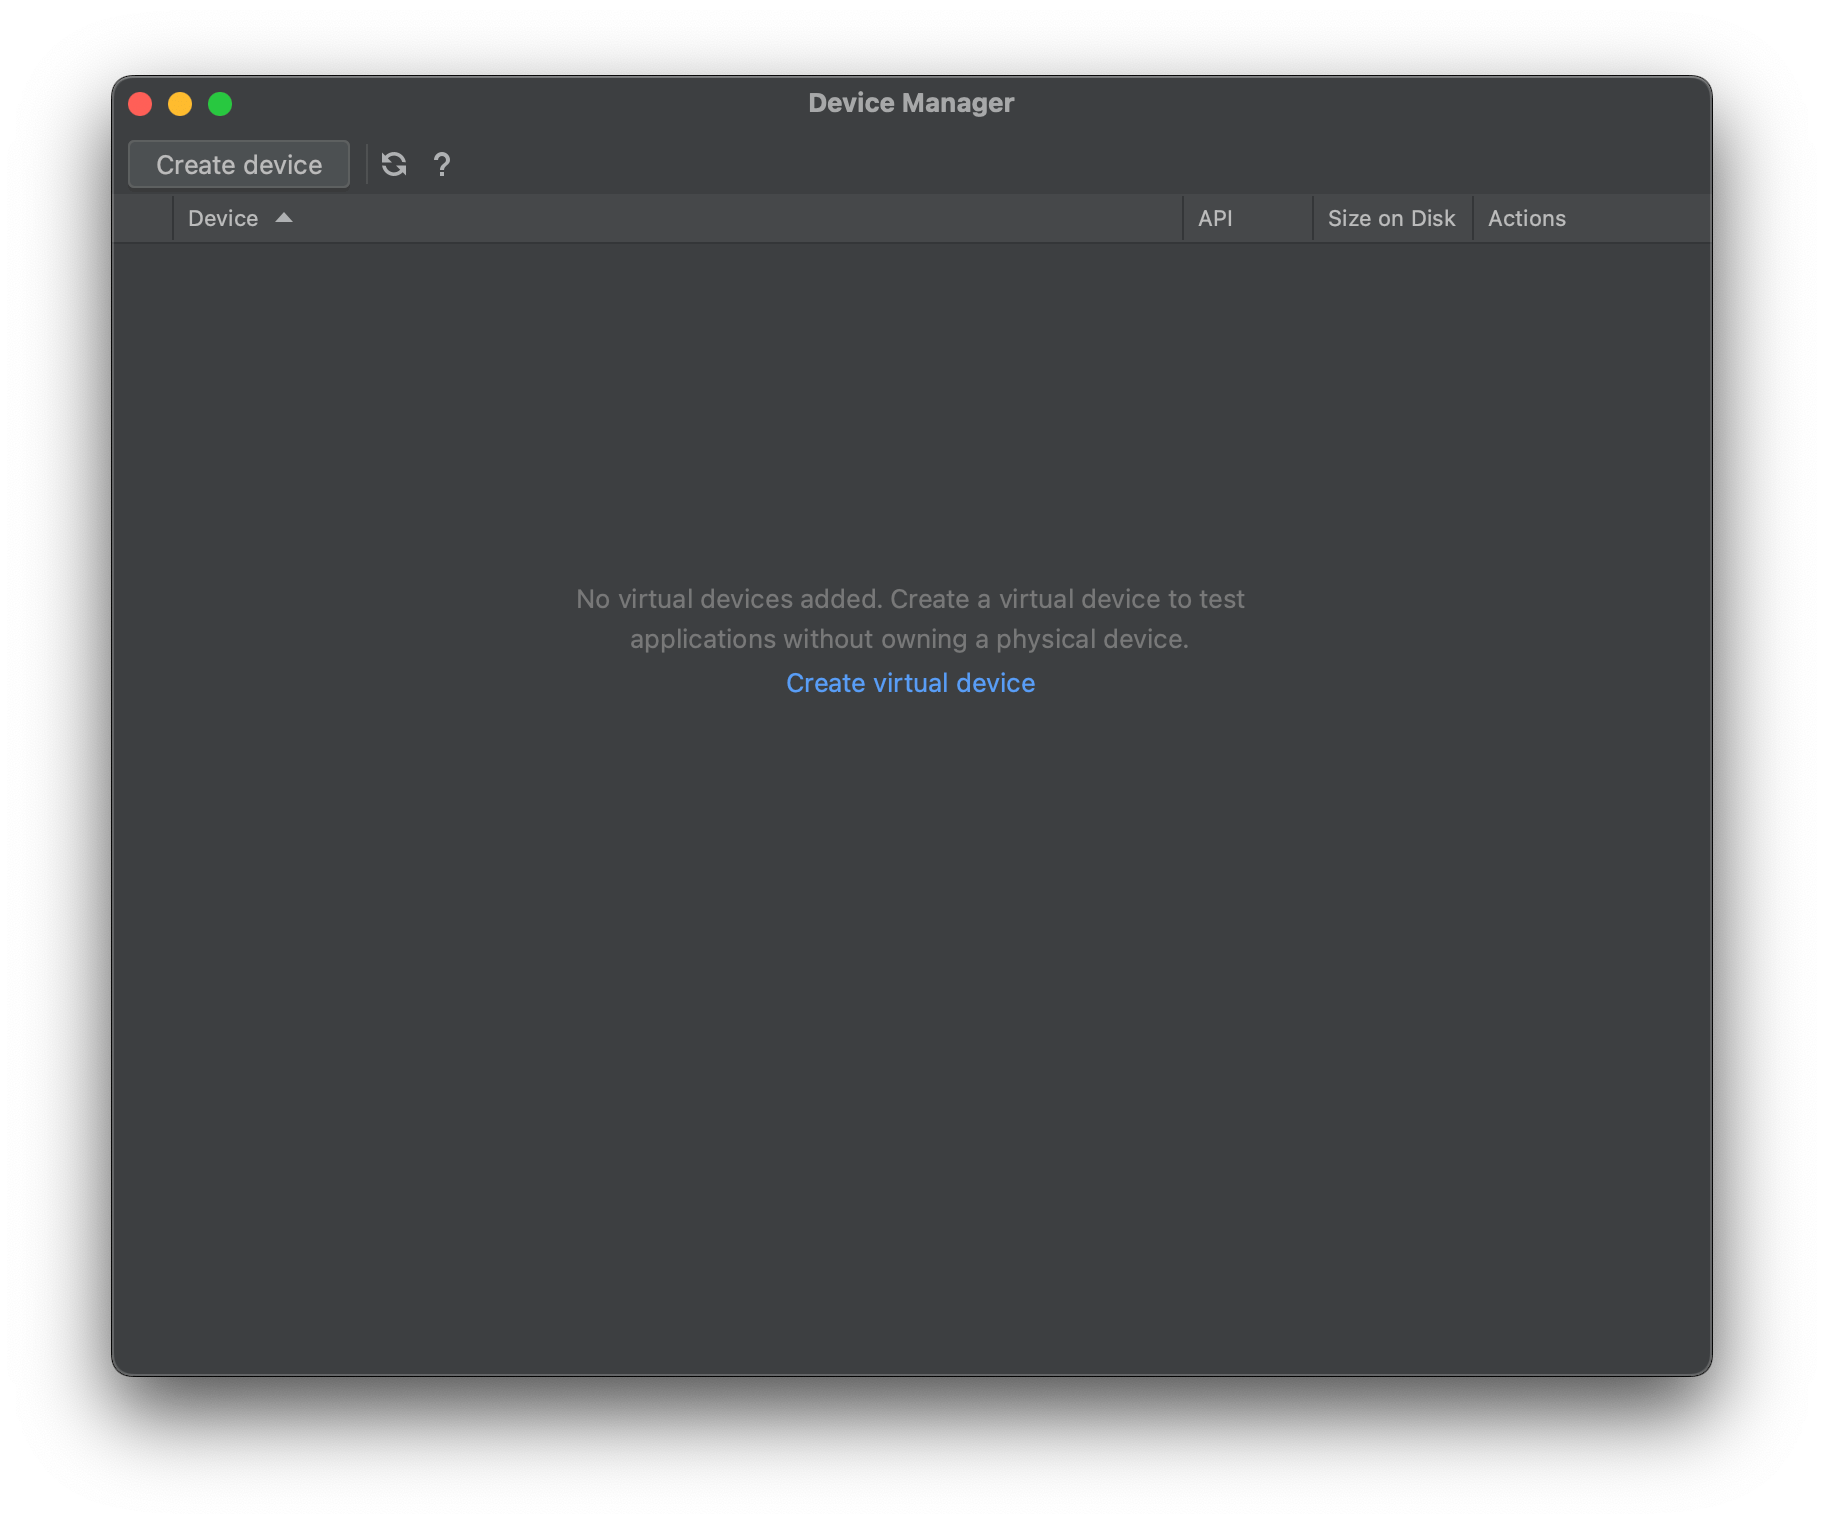
Click the Create device button.
3
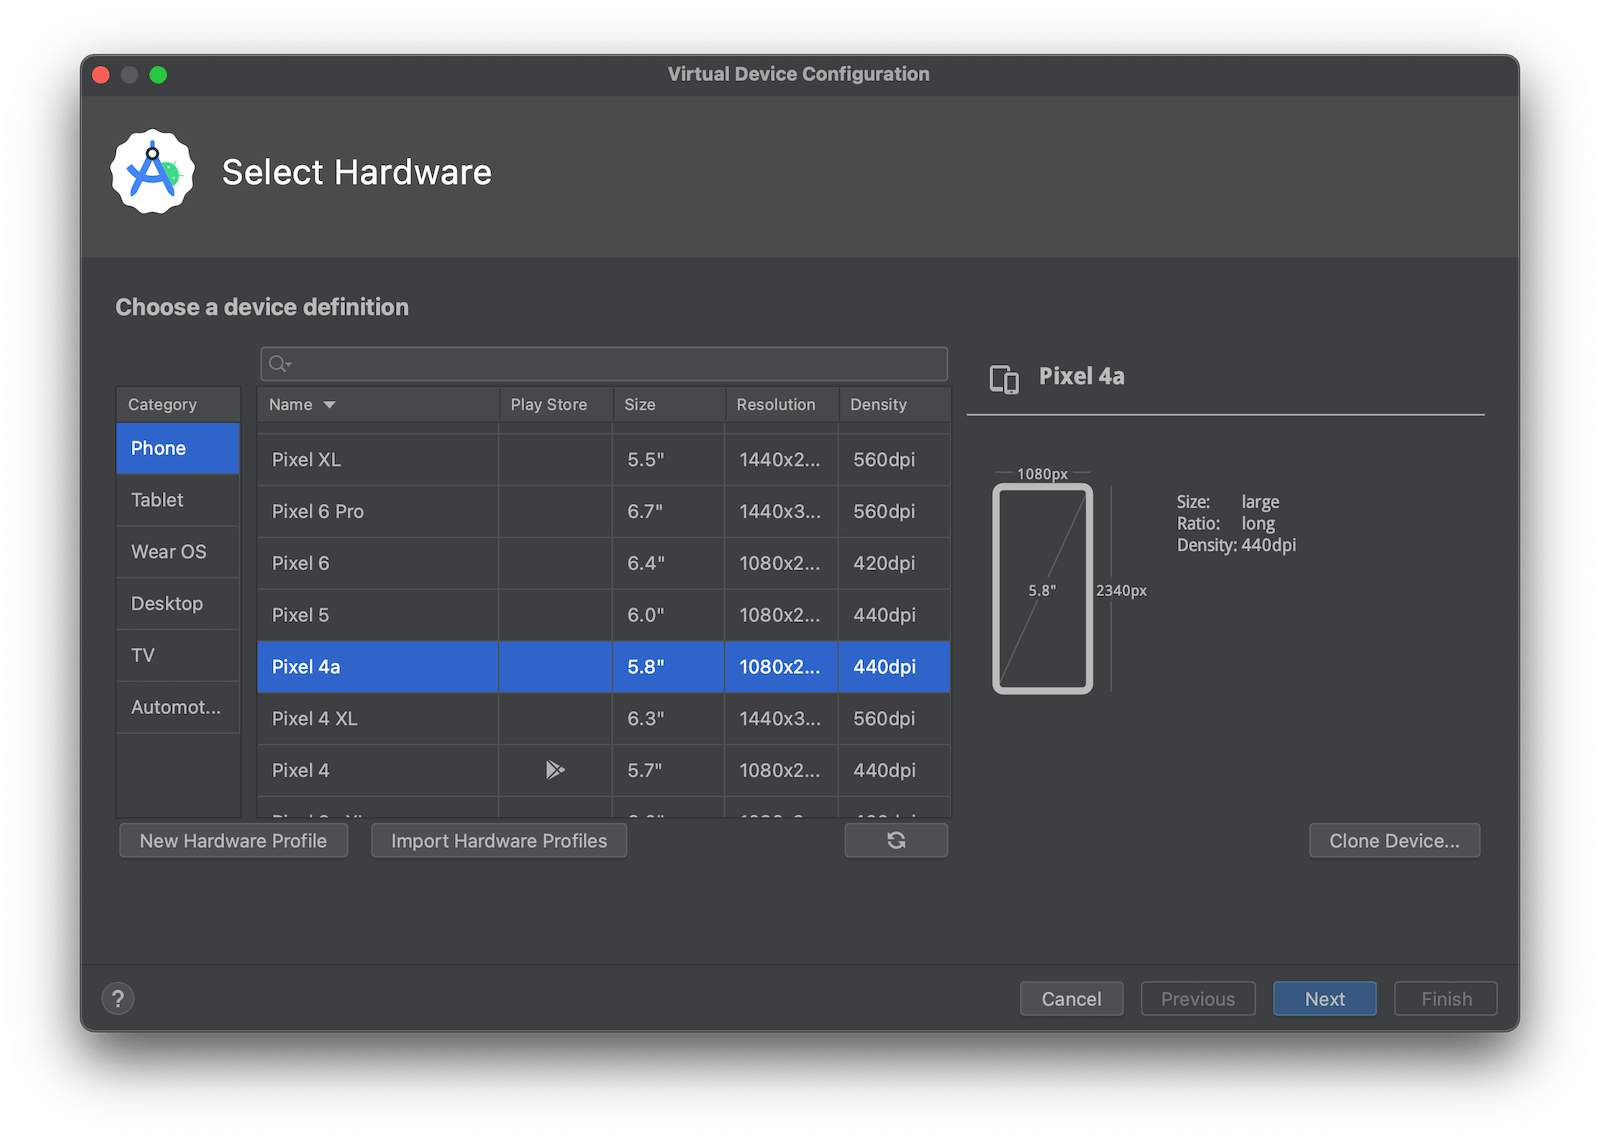
Under Select Hardware, choose the type of hardware you'd like to emulate. We recommend testing against a variety of devices, but if you're unsure where to start, the newest device in the Pixel line could be a good choice.
4
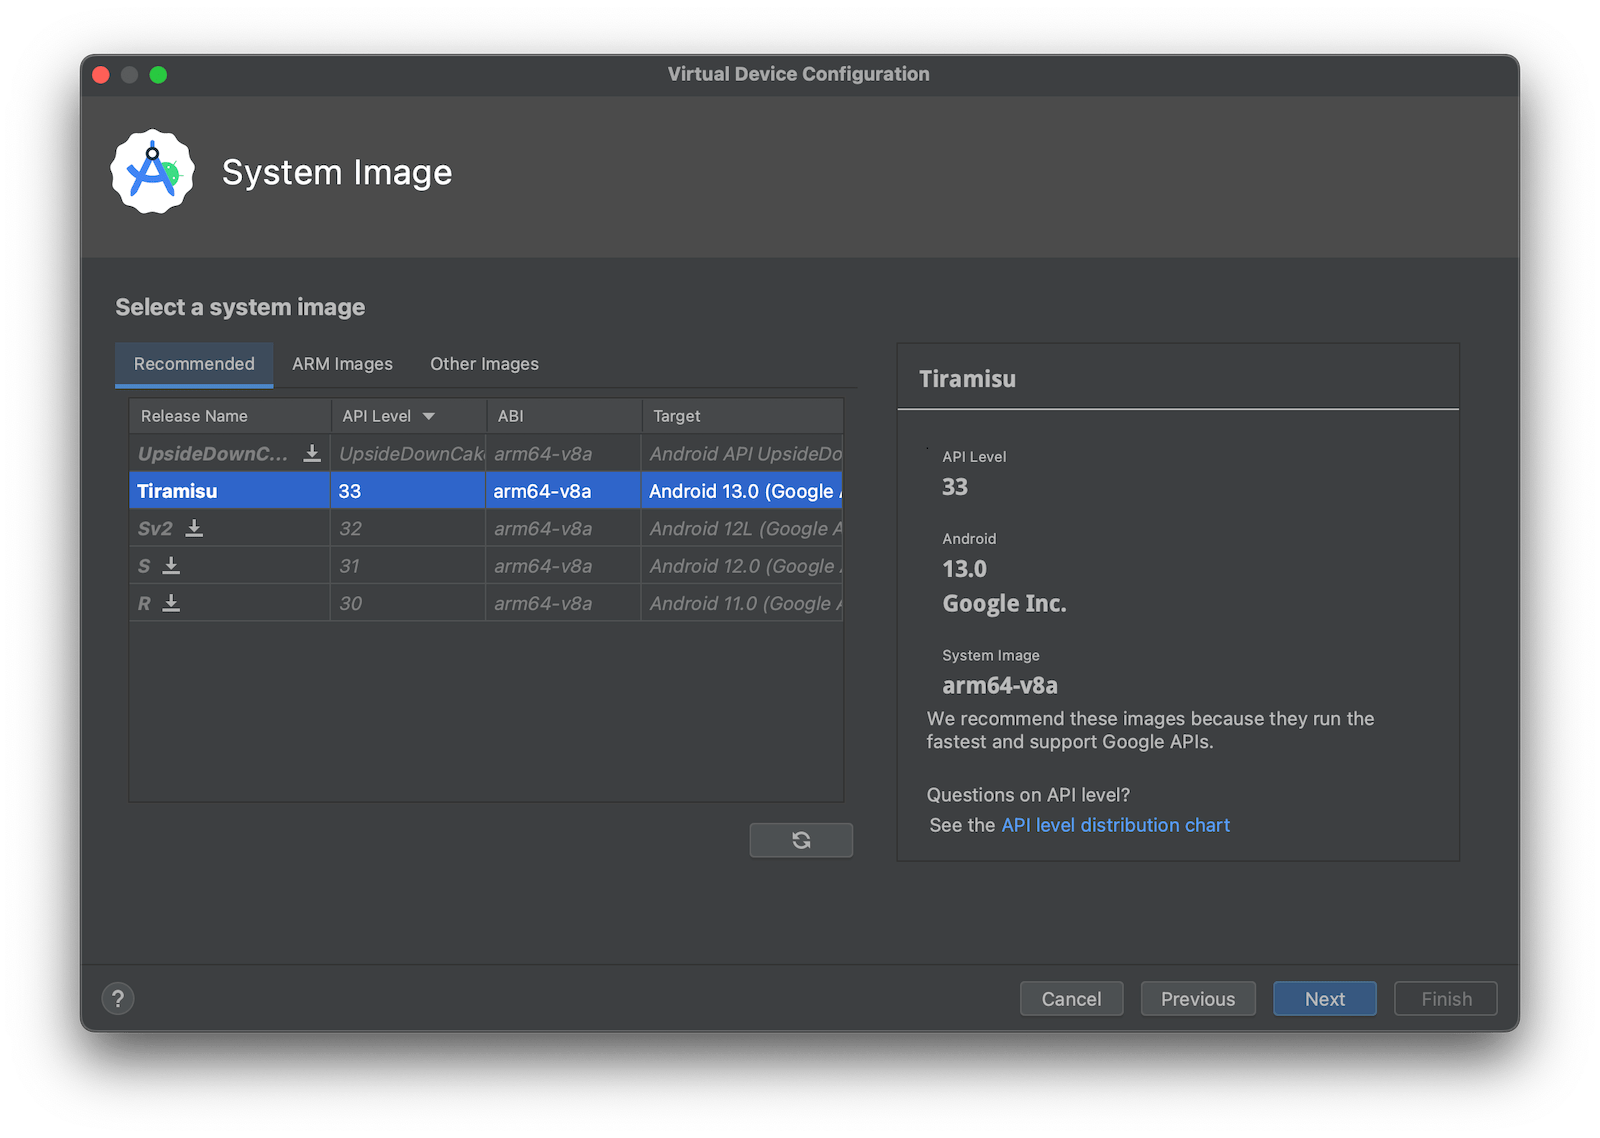
Select an OS version to load on the emulator (probably one of the system images in the Recommended tab), and download the image.
5
Change any other settings you'd like, and press Finish to create the virtual device. You can now run this device anytime by pressing the Play button in the AVD Manager window.
Multiple adb versions
Having multiple adb versions on your system can result in the following error:
- adb server version (xx) doesn't match this client (xx); killing...This is because the adb version on your system is different from the adb version on the Android SDK platform-tools.
1
Open the terminal and check the adb version on the system:
- adb version2
And from the Android SDK platform-tool directory:
- cd ~/Library/Android/sdk/platform-tools- ./adb version3
Copy adb from Android SDK directory to usr/bin directory:
- sudo cp ~/Library/Android/sdk/platform-tools/adb /usr/bin