Install development builds in React Native and bare projects
Learn how to configure development builds for bare React Native projects.
The installation steps on this page are only required to add the expo-dev-client library to a React Native or a bare project.
To add the
expo-dev-clientlibrary to an existing managed project, see Create development builds.
If you're starting your project, you can create a new project with our with-dev-client template. Run the following command to initialize the project:
- npx crna -t with-dev-clientOtherwise, if you already have an existing React Native or a bare project, follow the steps below to add expo-dev-client to it.
1
Set up Expo modules
If you created your project with npx react-native init and do not have any other Expo packages installed, you'd need to install Expo modules before proceeding.
Otherwise, if you already have expo and/or other Expo modules up and running, you can skip this step.
2
Installation
Add the expo-dev-client library to your package.json:
- npx expo install expo-dev-clientIf your project has an ios/ directory on disk, run the following command to fully install the native code for expo-dev-client:
- npx pod-installIf your project doesn't have an ios/ directory, you can skip this step.
3
Basic configuration
Development builds use deep links to open projects from the QR code. If you have added a custom deep link scheme to your project, your development build will use it. However, if this isn't the case, you need to configure the deep link support for your app. The uri-scheme package will do this for you once you have chosen a scheme.
- npx uri-scheme add <your scheme>For more information, see uri-scheme package.
4
Optional configuration
There are a few more changes you can make to get the best experience, but you can skip ahead to building if you prefer.
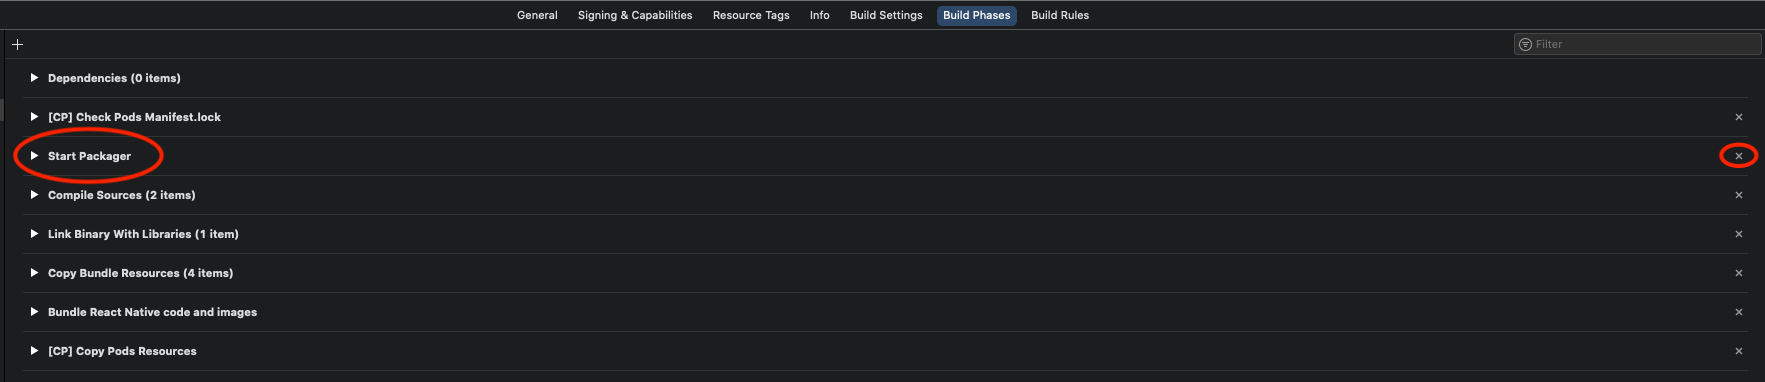
Disable packager autostart when building for iOS
When you start your project on iOS, the metro bundler will start automatically. This behavior might not be ideal when you want to use npx expo start. Our recommended solution is to remove the Start Packager action from building scripts. To do that you need to open the Xcode, go to Build Phases and remove the Start Packager action.
Add better error handlers
For certain type of errors, you can provide more helpful error messages. To turn this on, import expo-dev-client in the project's index file (in the managed workflow, you need to add this import on top of the App.{js|tsx}). Make sure that the import statement is above import App from './App'.
import 'expo-dev-client';
...
import App from "./App";
For more information, see Error handling.
Loading published updates
Development builds can also open and preview published updates to your app.
To add this feature, install expo-updates in your project:
- npx expo install expo-updatesAfter doing so, if your project has an ios/ directory on disk, you will need to reinstall CocoaPods:
- npx pod-install5
Build and install
You're now ready to build your first development build.